How to Use Plumber’s Tape: A Simple Guide for DIY Plumbing Repairs
When tackling a plumbing project, one tool that comes in handy for creating tight, leak-free connections is plumber’s tape, also known as Teflon tape. This versatile, affordable material is used by professionals and DIYers alike to seal threaded pipe connections. In this guide, we’ll show you how to properly use plumber’s tape for effective results.
Table of Contents
ToggleWhat Is Plumber’s Tape?
Plumber’s tape is a thin, flexible tape made from Teflon (PTFE) that helps seal the threads of pipes and fittings. It’s commonly used to prevent leaks in water and gas plumbing systems, providing a tight, watertight seal. Available in various widths and thicknesses, plumber’s tape is designed to withstand high pressure and extreme temperatures, making it ideal for most plumbing jobs.
Benefits of Using Plumber’s Tape:
-
Prevents leaks around threaded pipe joints
-
Reduces wear and tear on the threads
-
Easy to apply and remove
-
Compatible with a wide range of materials including PVC, copper, and steel
When Should You Use Plumber’s Tape?
Plumber’s tape is most commonly used in situations where two threaded pipes or fittings are connected. It’s ideal for sealing the following types of connections:
-
Faucet installations
-
Showerheads
-
Pipe fittings
-
Gas line connections
-
Water supply lines
It’s important to note that plumber’s tape should not be used on non-threaded fittings or compression joints, as it’s only effective for threaded connections.
Step-by-Step Guide: How to Use Plumber’s Tape
1. Turn off the Water or Gas Supply
Before you start working on any plumbing project, always make sure the water or gas supply is turned off. This will prevent leaks or any dangerous gas buildup.
2. Clean the Threads
Before applying plumber’s tape, clean the threads of the pipes or fittings. Dirt, debris, or old tape can prevent the new tape from adhering properly. Use a clean cloth to wipe away any residue, making sure the threads are dry and smooth.
3. Apply Plumber’s Tape
Take the end of the plumber’s tape and begin wrapping it around the male threads (the part of the pipe that has visible threads). It’s essential to wrap in the direction of the threads, which is usually clockwise. This allows the tape to tighten as the connection is made.
4. Wrap It Properly
The key to using plumber’s tape correctly is to apply it in multiple layers. You should wrap around the threads at least 2-3 times. The tape should be snug but not overly tight. Make sure it’s even and covers the entire threaded area. Avoid overlapping the tape too much as it can make the connection difficult to tighten.
5. Tighten the Connection
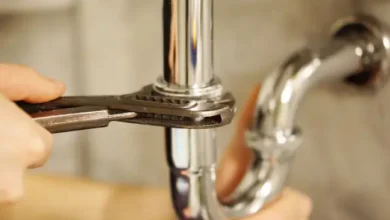
Once the tape is applied, screw the two fittings together by hand. After that, use a wrench to tighten the connection further, but be careful not to overtighten, as this could damage the threads or the tape.
6. Test for Leaks
After tightening, turn the water or gas supply back on and check for leaks around the connection. If you see any leaks, you may need to reapply the tape and tighten the connection again. In some cases, adding more layers of tape may be necessary.
Common Mistakes to Avoid When Using Plumber’s Tape
-
Overapplying the Tape: Too much tape can make it difficult to properly seal the joint. Stick to 2-3 layers for a tight, effective seal.
-
Using Tape on Non-Threaded Fittings: Plumber’s tape is only effective for threaded connections. Don’t use it on compression or push-fit fittings.
-
Not Wrapping in the Right Direction: Always wrap the tape clockwise around the threads. Wrapping in the opposite direction can cause the tape to unravel as the connection is tightened.
How Much Plumber’s Tape Should You Use?
While the exact amount can vary depending on the size of the fitting, a good rule of thumb is to apply 2-3 wraps around the threads. For larger fittings, you may need to apply a little more tape. Just be sure not to overdo it, as excess tape can lead to difficulties in tightening the connection.
Different Types of Plumber’s Tape
-
Standard Plumber’s Tape (White): Ideal for most general plumbing applications such as water pipes.
-
Yellow Plumber’s Tape: This version is designed specifically for gas lines and is thicker to handle the higher pressure and potential for leaks in gas systems.
-
Blue Plumber’s Tape: Suitable for use with drinking water, as it’s often rated for potable water systems.
-
Pink Plumber’s Tape: Often used in food-grade applications where the tape needs to be certified safe for use with food or beverages.
Conclusion
Using plumber’s tape is a simple and effective way to seal threaded connections and prevent leaks in your plumbing system. With its easy application and wide range of uses, it’s an essential tool for DIY plumbing repairs and installations. By following the proper steps and avoiding common mistakes, you can ensure that your connections are leak-free and long-lasting. Whether you’re fixing a faucet or installing new pipe fittings, plumber’s tape can make all the difference in achieving a secure, watertight seal.
