
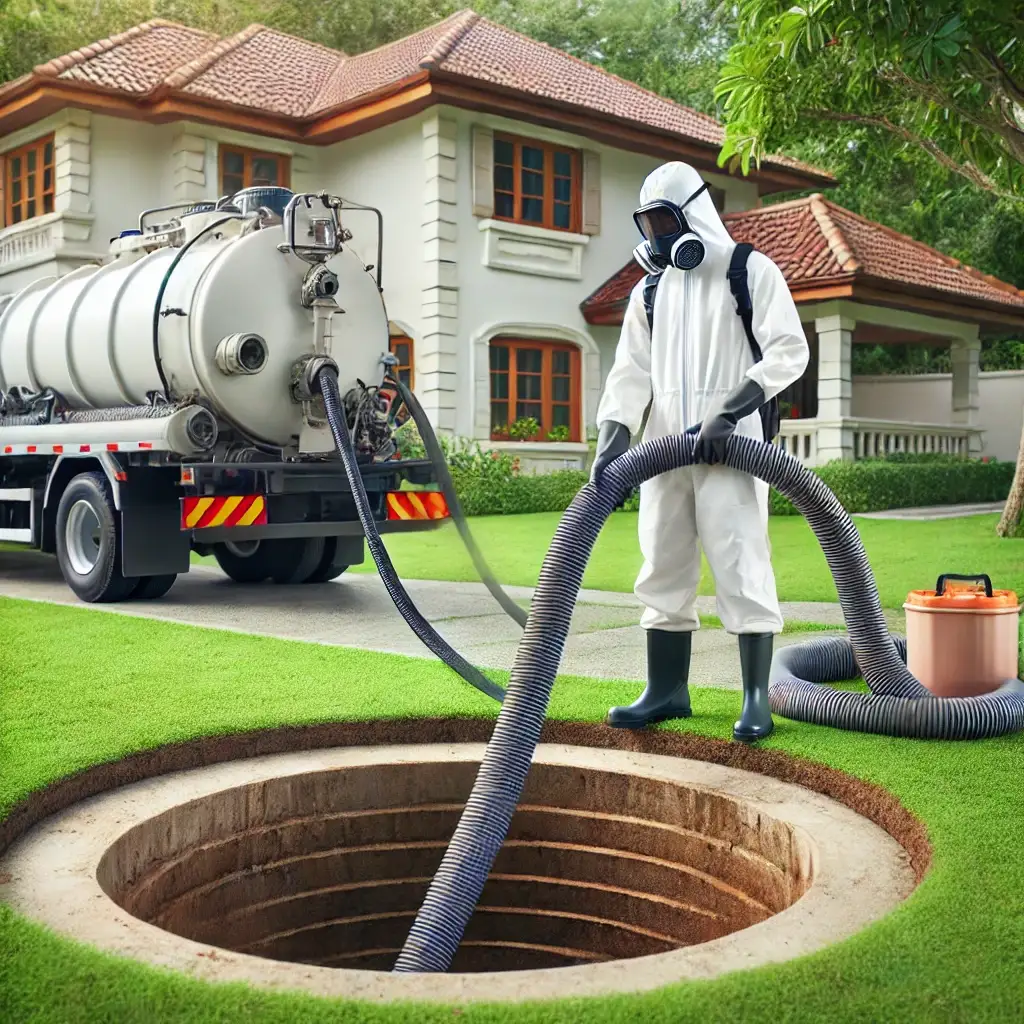

Living in a home with an off-grid wastewater system? Learn everything about septic tank cleaning and pumping—how septic systems work, crucial warning signs of failure, step-by-step professional pumping processes, cost breakdowns, and DIY maintenance habits to avoid catastrophic backups.
Table of Contents
- 1. Introduction: Why Septic Tank Maintenance is Non-Negotiable
- 2. How an Onsite Septic System Works (The Anatomy & Biological Science)
- 3. Septic Tank Cleaning vs. Septic Pumping: Understanding the Difference
- 4. Crucial Warning Signs Your Septic Tank Needs Immediate Cleaning
- 5. How Often Should You Clean Your Septic Tank? (Frequency Factors)
- 6. Comprehensive Step-by-Step Guide: The Professional Septic Tank Pumping & Cleaning Process
- 7. Health, Environmental, & Legal Consequences of Neglecting Your Septic Tank
- 8. Septic Tank Cleaning Costs: Detailed Price & Factor Breakdown
- 9. Daily & Monthly Habits to Keep Your Septic System Healthy
- 10. Common Septic System Myths Debunked (Do Additives Really Work?)
- 11. Frequently Asked Questions (Comprehensive FAQs)
1. Introduction: Why Septic Tank Maintenance is Non-Negotiable
For millions of suburban and rural homeowners, off-grid wastewater treatment is powered by an underground septic system rather than a municipal sewer connection. When functioning correctly, a septic tank quietly processes every gallon of wastewater produced by your toilets, showers, washing machines, and kitchen sinks without a hitch.
However, because septic tanks are subterranean and hidden out of sight, they are often subjected to “out of sight, out of mind” neglect. Unlike municipal utilities that constantly process sewage away from your property, an underground septic tank has a finite volumetric capacity. Over time, heavy solids settle into dense sludge layers that must be mechanically removed through professional septic tank cleaning and pumping.
Neglecting septic maintenance inevitably leads to severe consequences: raw sewage backing up into home fixtures, contaminated groundwater, ruined drain fields, and repair costs that easily stretch into tens of thousands of dollars. Regular septic cleaning is not an optional luxury—it is the single most vital component of off-grid home maintenance.
2. How an Onsite Septic System Works (The Anatomy & Biological Science)
To understand why septic tanks fill up and require routine cleaning, it helps to break down the anatomy of a residential septic system and the natural biological processes taking place inside it.
A. The Underground Tank
A septic tank is a watertight underground vessel—typically constructed from concrete, heavy-duty polyethylene plastic, or fiberglass—located outside the home. Modern tanks usually feature two internal chambers separated by a dividing baffle wall. Wastewater flows into the first chamber via a main sewer inlet pipe.
B. The Three-Layer Separation Process
Once wastewater enters the primary compartment, gravity naturally separates the effluent into three distinct layers based on density:
- The Scum Layer (Top Layer): Lightweight materials such as cooking oils, grease, fats, hair, soap residue, and floatable solids rise to the surface, forming a thick, floating mat known as scum.
- The Liquid Effluent Layer (Middle Layer): Relatively clear water containing dissolved nutrients, organic matter, and microscopic bacteria sits in the middle. As fresh wastewater enters the tank, this liquid effluent exits through an outlet baffle into the secondary chamber and onward into the absorption field (drainfield).
- The Sludge Layer (Bottom Layer): Dense organic waste, feces, undigested food scraps, toilet paper fibers, and inorganic sediment sink to the floor of the tank, creating a dense layer known as sludge.
C. Anaerobic Digestion
Within the oxygen-deprived environment of the septic tank, naturally occurring anaerobic bacteria feed on the organic material in the sludge and scum layers. This biological action liquefies a portion of the solid waste, releasing gases like methane and hydrogen sulfide (which escape through home vent stacks). However, anaerobic bacteria cannot digest inorganic matter or hard minerals, meaning the bottom sludge layer constantly accumulates month after month.
3. Septic Tank Cleaning vs. Septic Pumping: Understanding the Difference
Though homeowners and technicians often use the terms interchangeably, there is a distinct difference between standard septic pumping and deep septic cleaning:
| Service Feature | Septic Tank Pumping | Septic Tank Cleaning |
|---|---|---|
| Primary Objective | Extracts the standing liquid effluent and loose, top-level sludge layers. | Completely strips and evacuates compacted bottom sludge, hardened side-wall buildup, and thick scum mats. |
| Methodology | Inserts a vacuum hose into the main access hatch to pull out liquid waste. | Combines heavy vacuum extraction with high-pressure water back-flushing or mechanical agitation (mucking/scraping). |
| Inspection Level | Basic volume check and quick visual inspection of liquid levels. | Comprehensive structural inspection of baffles, walls, floor integrity, and inlet/outlet tees. |
| Recommended Frequency | Every 3 to 5 years for normal household sizes. | Performed alongside pumping during routine service, or when sludge buildup exceeds 33% of tank depth. |
4. Crucial Warning Signs Your Septic Tank Needs Immediate Cleaning
Waiting until sewage bursts into your bathtub is a costly mistake. Watch for these early warning signs that indicate your septic tank is nearing maximum capacity:
- Sluggish Drainage Across Multiple Fixtures: If a single sink drains slowly, it is likely a local pipe clog. If toilets, showers, tubs, and laundry drains across the entire house drain slowly at the same time, the septic tank is full.
- Frequent Toilet Gurgling: Air bubbles trapped under rising effluent levels in a full tank force sewer gas backward, causing gurgling or bubbling noises when toilets are flushed.
- Foul Sewer Odors: A persistent smell of rotten eggs (hydrogen sulfide) around the septic access lids, lawn above the tank, or inside bathrooms indicates a full tank or failing vent line.
- Unusually Lush, Bright Green Lawn Spots: Is the grass sitting directly above your septic tank or drainfield noticeably greener, thicker, and faster-growing than the rest of your yard? This occurs when a full tank overflows nutrient-rich liquid waste upward toward the soil surface.
- Soggy Ground or Standing Water in the Yard: Pooled water or squishy, muddy soil around the septic area during dry weather indicates effluent cannot filter down and is forcing its way up to the surface.
- Sewage Backups in Low-Lying Fixtures: The most severe symptom: blackish, foul-smelling wastewater backing up into basement floor drains, ground-floor showers, or toilets.
5. How Often Should You Clean Your Septic Tank? (Frequency Factors)
Environmental Protection Agencies (EPA) generally recommend pumping and inspecting a residential septic system every 3 to 5 years. However, strict schedules depend on several crucial variables:
1. Household Size & Usage Volume
A single occupant living in a three-bedroom house generates far less solid waste than a family of six in the same home. More occupants mean more daily toilet flushes, showers, dishwashing cycles, and faster sludge accumulation.
2. Total Septic Tank Capacity
A smaller 750-gallon tank reaches capacity significantly faster than a large 1,500-gallon tank. Matching tank size to household occupant density is critical.
3. Garbage Disposal Usage
Homes equipped with kitchen garbage disposals send finely ground food scraps straight into the septic tank. Food particles digest slowly, increasing the rate of sludge accumulation by up to 50%. If you use a garbage disposal daily, plan to pump your tank every 2 to 3 years.
4. Volume of Wastewater Generated
Excessive water usage (running frequent back-to-back laundry loads or leaky fixtures) flushes liquid through the tank too rapidly. This prevents solid waste from settling to the bottom, pushing floating solids out into the drainfield where they clog soil pores.
6. Comprehensive Step-by-Step Guide: The Professional Septic Tank Pumping & Cleaning Process
Septic tank cleaning is a specialized task involving hazardous gases, toxic pathogens, and heavy vacuum equipment. Below is the detailed, step-by-step procedure certified septic technicians follow during a professional service call:
Step 1: Site Location and Excavation
The technician locates the subterranean septic tank using property layout maps or electronic pipe-locating probes. If access risers are not installed above ground, the operator carefully unearths soil using shovels to expose the primary and secondary compartment access lids (scuttle covers).
Step 2: Pre-Inspection and Safety Verification
Before opening the tank, the technician enforces strict safety measures:
- No open flames, smoking, or spark-emitting tools are allowed near the opening due to explosive methane gas ($CH_4$).
- The operator avoids breathing near the exposed hatch to prevent inhaling toxic gases like hydrogen sulfide ($H_2S$).
- The technician checks the current liquid operating level. If levels are significantly above the outlet pipe, it indicates a clogged drainfield. If levels are below the outlet pipe, it signals a cracked, leaking tank shell.
Step 3: Connecting the Vacuum Equipment
A heavy-duty pumper truck equipped with a large vacuum pump and a 3-inch or 4-inch reinforced suction hose is positioned within reach of the tank. The operator lowers the suction hose through the main central access port into the tank, guiding it down into the dense bottom sludge layer.
Step 4: Primary Liquid and Sludge Extraction
The high-power vacuum pump is engaged. The operator systematically draws out the floating top scum layer, middle effluent liquid, and bottom sludge layer simultaneously. The technician manually moves the suction hose in sweeping motions to pull waste from all corners of the primary chamber.
Step 5: Back-Flushing and Crust Breaking (Mechanical Agitation)
As liquid is extracted, dense sludge and hardened scum mats at the bottom often remain stuck to the tank floor. To solve this, technicians perform back-flushing (back-pumping):
- The technician diverts a portion of the pumped liquid waste back into the tank through the hose under pressure.
- This pressurized recirculation breaks up hardened sludge cakes and liquefies thick scum crusts.
- The operator resumes vacuum pumping, extracting the newly suspended solids completely.
Step 6: High-Pressure Water Wall Scraping & Jetting
To turn standard pumping into a deep cleaning service, the technician uses a high-pressure fresh water hose to wash down interior concrete or plastic walls. This removes bio-film slime, grease rings, and calcified mineral deposits, ensuring no residual waste remains inside the tank shell.
Step 7: Secondary Chamber Cleaning
If the system features a two-compartment tank, the technician opens the secondary compartment access cover and repeats the vacuum extraction and rinsing process to clean out fine suspended solids that crossed over the dividing baffle wall.
Step 8: Inspection of Baffles, Tees, and Tank Structure
With the tank entirely empty and washed clean, the technician performs a thorough visual inspection using specialized lights:
- Inlet & Outlet Baffles (Tee Pipes): Checks if plastic or concrete baffles are structurally sound, unclogged, and securely attached. Missing outlet baffles allow floating solids to escape and permanently ruin the drainfield.
- Structural Integrity: Inspects concrete tank walls for cracks, severe rebar corrosion, or root intrusion; inspects plastic/fiberglass tanks for structural bowing or wall collapse.
- Divider Wall Condition: Verifies that the internal baffle wall between chambers remains intact.
Step 9: Replacing Covers and Restoring the Site
The technician replaces access lids securely, tightening safety bolts to prevent accidental child or pet access. If soil was excavated, it is backfilled and leveled flush with the surrounding lawn.
Step 10: Responsible Waste Transport & Regulatory Manifest
The extracted septage is safely transported in the vacuum truck to an authorized municipal wastewater treatment facility or state-approved septage receiving station. The homeowner receives a service report detailing extracted gallon volume, tank condition, and recommended maintenance schedules.
7. Health, Environmental, & Legal Consequences of Neglecting Your Septic Tank
Failing to schedule timely septic cleaning introduces severe hazards that extend far beyond inconvenient household plumbing backups:
A. Total Drainfield Failure (The $10,000+ Nightmare)
When sludge accumulates unchecked, it fills the tank until solids spill directly into the outlet pipe and out into the soil drainfield (leach field). Fine organic particles clog the tiny pores in the surrounding gravel and soil, forming an impermeable layer known as biomat. Once a drainfield is completely blinded by biomat, liquid can no longer filter into the earth. The entire drainfield fails and must be fully excavated and replaced at extreme expense.
B. Groundwater and Drinking Water Contamination
Untreated septic wastewater carries dangerous pathogens including E. coli, Salmonella, Giardia, and enteric viruses, along with high levels of nitrates. If a septic tank leaks or overflows untreated sewage near wellheads, it can contaminate underground aquifers supplying drinking water to your home and neighboring properties.
C. Public Health Violations & Fines
Local health departments enforce strict codes regarding raw sewage surfacing on residential properties. A failing, overflowing septic system is classified as a public health hazard and can result in daily local fines, condemnation notices, or mandatory emergency repairs.
8. Septic Tank Cleaning Costs: Detailed Price & Factor Breakdown
Understanding the financial investments involved helps homeowners budget effectively for routine septic care:
| Service Item | Estimated Cost Range (USD) | Service Details |
|---|---|---|
| Standard Septic Tank Pumping (1,000 Gal) | $300 – $600 | Routine extraction of liquid and sludge for average residential systems. |
| Large Tank Pumping (1,500+ Gal) | $500 – $900 | Higher gallon capacity extraction requiring larger vacuum truck capacity. |
| Deep Cleaning & High-Pressure Washing | $150 – $300 (Additional) | High-pressure water washing of tank walls, baffles, and heavy sludge agitation. |
| Manual Excavation (Digging Access) | $100 – $250 (Additional) | Labor fee charged if technician has to manually dig up deep soil to expose tank lids. |
| Riser Cover Installation | $300 – $600 (One-time) | Installs permanent, surface-level access hatches to eliminate future digging costs. |
Pro Tip: Installing permanent access risers brings your septic hatches flush with ground level, saving hundreds of dollars in manual digging fees during future maintenance visits.
9. Daily & Monthly Habits to Keep Your Septic System Healthy
Between professional pumping visits every 3 to 5 years, practicing smart daily water and waste habits will protect your system’s delicate biological balance:
1. Guard What Goes Down the Drain (The “Three Ps” Rule)
Only three things should ever be flushed down a septic toilet: Pee, Poop, and (Toilet) Paper. Never flush any of the following items:
- Baby wipes, “flushable” wet wipes, paper towels, or facial tissues.
- Feminine hygiene products, cotton balls, or Q-tips.
- Cat litter (even flushable varieties expand and settle into rock-hard clay beds).
- Cigarette butts, coffee grounds, or dental floss.
- Condoms, latex gloves, or plastic packaging.
2. Mind Your Chemical Usage
Your septic tank is a living biological ecosystem that relies on beneficial bacteria to break down organic waste. Pouring harsh chemicals down drains kills these microbial colonies:
- Avoid: Pouring excess chlorine bleach, harsh chemical drain openers (lye/sulfuric acid), synthetic paint thinners, oil-based solvents, or motor oils down drains.
- Use: Eco-friendly, septic-safe, biodegradable household cleaning products, and liquid laundry detergents low in phosphates.
3. Practice Smart Water Conservation
Flooding your septic tank with excessive water volumes forces unsettled solids out into the drainfield before they can decompose properly. Space out laundry loads throughout the week instead of doing 6 loads on a single day. Install low-flow showerheads and dual-flush toilets to reduce overall daily hydraulic load.
4. Protect the Drainfield Surface Area
- Never Park or Drive Vehicles Over the Tank or Drainfield: Heavy vehicle weight crushes underlying plastic or clay pipes and compacts soil, destroying its filtration ability.
- Plant Only Short Grass Over the System: Avoid planting trees or large woody shrubs near the septic system; aggressive roots travel long distances to infiltrate pipes.
- Divert Surface Runoff Away: Ensure rainwater downspouts, roof gutters, and yard drainage slopes route stormwater far away from the drainfield.
10. Common Septic System Myths Debunked (Do Additives Really Work?)
Myth 1: “Adding biological enzymes or yeast means you never have to pump your tank.”
FACT: This is a persistent and dangerous marketing myth. While enzyme powders or bacterial starter packs can temporarily boost micro-organism activity, they cannot digest inorganic minerals, plastic fibers, hair, or dense sludge. No chemical or biological additive replaces mechanical vacuum pumping.
Myth 2: “If my sinks drain fine, my septic tank does not need cleaning.”
FACT: Sludge accumulates silently at the bottom of the tank without affecting water flow until it reaches critical mass. By the time drains start backing up, sludge may already have overflowed into the drainfield, causing irreversible subsurface damage.
Myth 3: “Garbage disposals are completely fine for all septic systems.”
FACT: Garbage disposals bypass the human digestive process, depositing raw food proteins and dense starches into the tank that decompose extremely slowly. Disposals increase solid waste accumulation dramatically and require significantly more frequent pumping.
11. Frequently Asked Questions (Comprehensive FAQs)
Q1: Can I pump or clean my septic tank myself?
No. DIY septic pumping is extremely dangerous and illegal in most jurisdictions without commercial disposal permits. Septic tanks emit lethal, toxic gases ($H_2S$, $CH_4$, $CO$) that cause sudden unconsciousness and asphyxiation. Furthermore, specialized 2,000+ gallon vacuum trucks are required to safely extract, transport, and dump human septage at regulated treatment facilities.
Q2: How do I find where my septic tank is buried?
You can locate your septic tank by examining your property’s county health department permit map, following the main sewer stack pipe exiting your home through a basement wall or crawlspace, using an electronic pipe transmitter, or probing the ground with a thin metal soil probe 10 to 15 feet outside the foundation.
Q3: What happens if I never pump my septic tank?
Eventually, accumulated sludge fills 100% of the tank’s liquid capacity. Wastewater will either back up directly into your home’s bathtubs and sinks, or raw sewage will overflow onto your lawn. Unfiltered solids will stream into the drainfield, completely clogging soil pores and forcing a full system replacement costing upwards of $10,000 to $25,000.
Q4: How long does a typical septic pumping service call take?
A standard residential pumping and cleaning service call takes approximately 45 to 90 minutes once access covers are unearthed, depending on tank size, sludge density, and whether high-pressure washing or back-flushing is required.
Q5: Is it normal for the septic tank to fill up with liquid again right after pumping?
Yes, absolutely. Septic tanks are engineered to operate completely full of liquid. Within a few days of normal household water use after pumping, liquid levels will refill up to the bottom of the outlet pipe. This is normal operating procedure; the goal of pumping is removing accumulated dense solids and sludge at the bottom, not keeping the tank dry.